Google Analytics Tracking Code

Showing posts with label Baby. Show all posts

Saturday, June 23, 2012

Baby's Room Reveal

Our little guy's room is done! Hooray! I absolutely love how it turned out! My husband even loves it and I've found him in there just relaxing in the chair :) Not quite sure what you'd call the theme, but I call it Rustic Beachy Nautical. Yeah I know beachy is not even a real word, but that's the best I could come up with :) Stay tuned for posts about all the DIY projects: compass pillow, striped pillow, vintage canvas map, number canvas, oars upgrade, twine initial, faux basket liner and bedding. Enjoy!


DIY Compass Pillow

DIY Vintage Canvas Map

DIY Number Canvas

DIY Oars and Twine Initial


Thursday, December 15, 2011

Tulle Christmas Skirts

Hello my friends! Are you surprised to see me?! It's about time I know! I've been busy working on Christmas gifts...one in particular that is being done on the computer and long story short my computer is acting up and is lucky it hasn't gone through the window yet! :)

I finished my girls Christmas skirts a few weeks ago and we made it to see Santa last week so I thought I'd share the tutorial with you. I apologize for the horrible photos! I saw this tulle skirt and knew it would be so cute for Christmas! I'm all about the puffy skirts for little girls!


Here's what you'll need:
base fabric for skirt - I had mine on hand. It's satin silver
Tulle - I used about 4 yards for my 3 1/2 yr old skirt and 3 yards for 19 month old skirt
elastic for waist band
matching thread

  1. Take measurements and double the waist and add 3" to the length. So for my oldest it was 20x11 so I cut my fabric to 40x14.
  2. Cut tulle 6"x the width of the fabric cut in half. Lay tulle out (I had mine cut into 1 yard increments so it was easier to handle) cut along folded edge so you have 2 layers on top of each other. Then cut 6" wide strips.
  3. Press and hem bottom edge of skirt.

     4. Fold tulle strip in half and in half again and bunch together about an inch from the top (will look like a sack) and pin to skirt. I let the bottom of the tulle hang over the edge a little bit (I just eyeballed it...I knew I would need three rows for the bigger skirt and two for the smaller so I just centered them. I also decided after I took the pictures that the tulle bunches needed to be closer together and made them overlap the bunch next to it about an inch.
Tulle bunch (don't mind the lunch spot on my sleeve) :)


     5. Using sewing machine sew bottom row of tulle bunches on. Repeat steps for the next 1 or 2 rows.
Sewing second row on

Sewing second row on
      6. Fold over and pin top to make pocket for elastic.
      7. Pin ends of skirt together.
     8. Sew side seams together first. Then hem waist seam. Make sure to leave an opening to thread the elastic through.
Don't mind the head shadow...I didn't notice until after the fact! Oops!
     9. Sew ends of elastic together and sew up the opening and and you're done! Hooray!


And here's a little something extra to make you smile! Enjoy!

Monday, November 7, 2011

Infant Carrier Canopy

You know how I said I was working on a few projects for my sister-in-laws baby shower that was last Saturday? Well I refinished a crib for her and will hopefully get a picture of it once they get it all set up. I also made her a infant carrier canopy. This is a really easy and cute project and you can get creative with it.

Here's what you will need:
2 yards of fabric (If you want different fabric on each side then you'll use a yard of two coordinating fabrics)
Sewing machine and matching thread
Hot glue
velcro for straps
embellishments for straps. I made flower rosettes with a jewel in the middle.
  1. Lay fabric right sides facing together. Cut four 3 inch x 8 inch strips off an edge to use for the straps.
  2. Round the corners of your fabric. I used a plate to trace the edges and then cut.
  3. Straight stitch right sides together leaving about 4 inches to turn it right side out.
  4. Straight stitch the 4 inch opening closed.
  5. Iron all edges flat.
  6. Choose a decorative stitch and go all the way around canopy. I used a zigzag stitch and with white thread.
  7. Repeat steps 3-6 for the straps. (I left one edge open to turn it right side out.)
  8. Fold canopy in half horizontally. Pin straps on the fold, in the middle and equally spaced apart.
  9. Sew straps on using a straight stitch. I did a 2 inch square to make sure it was securely fastened.
  10. Hot glue on velcro and embellishments


What do you think? I love the simplicity of it. Sometimes a little pop of color is all you need! Enjoy!

Wednesday, August 24, 2011

Baby Gift Cupcakes

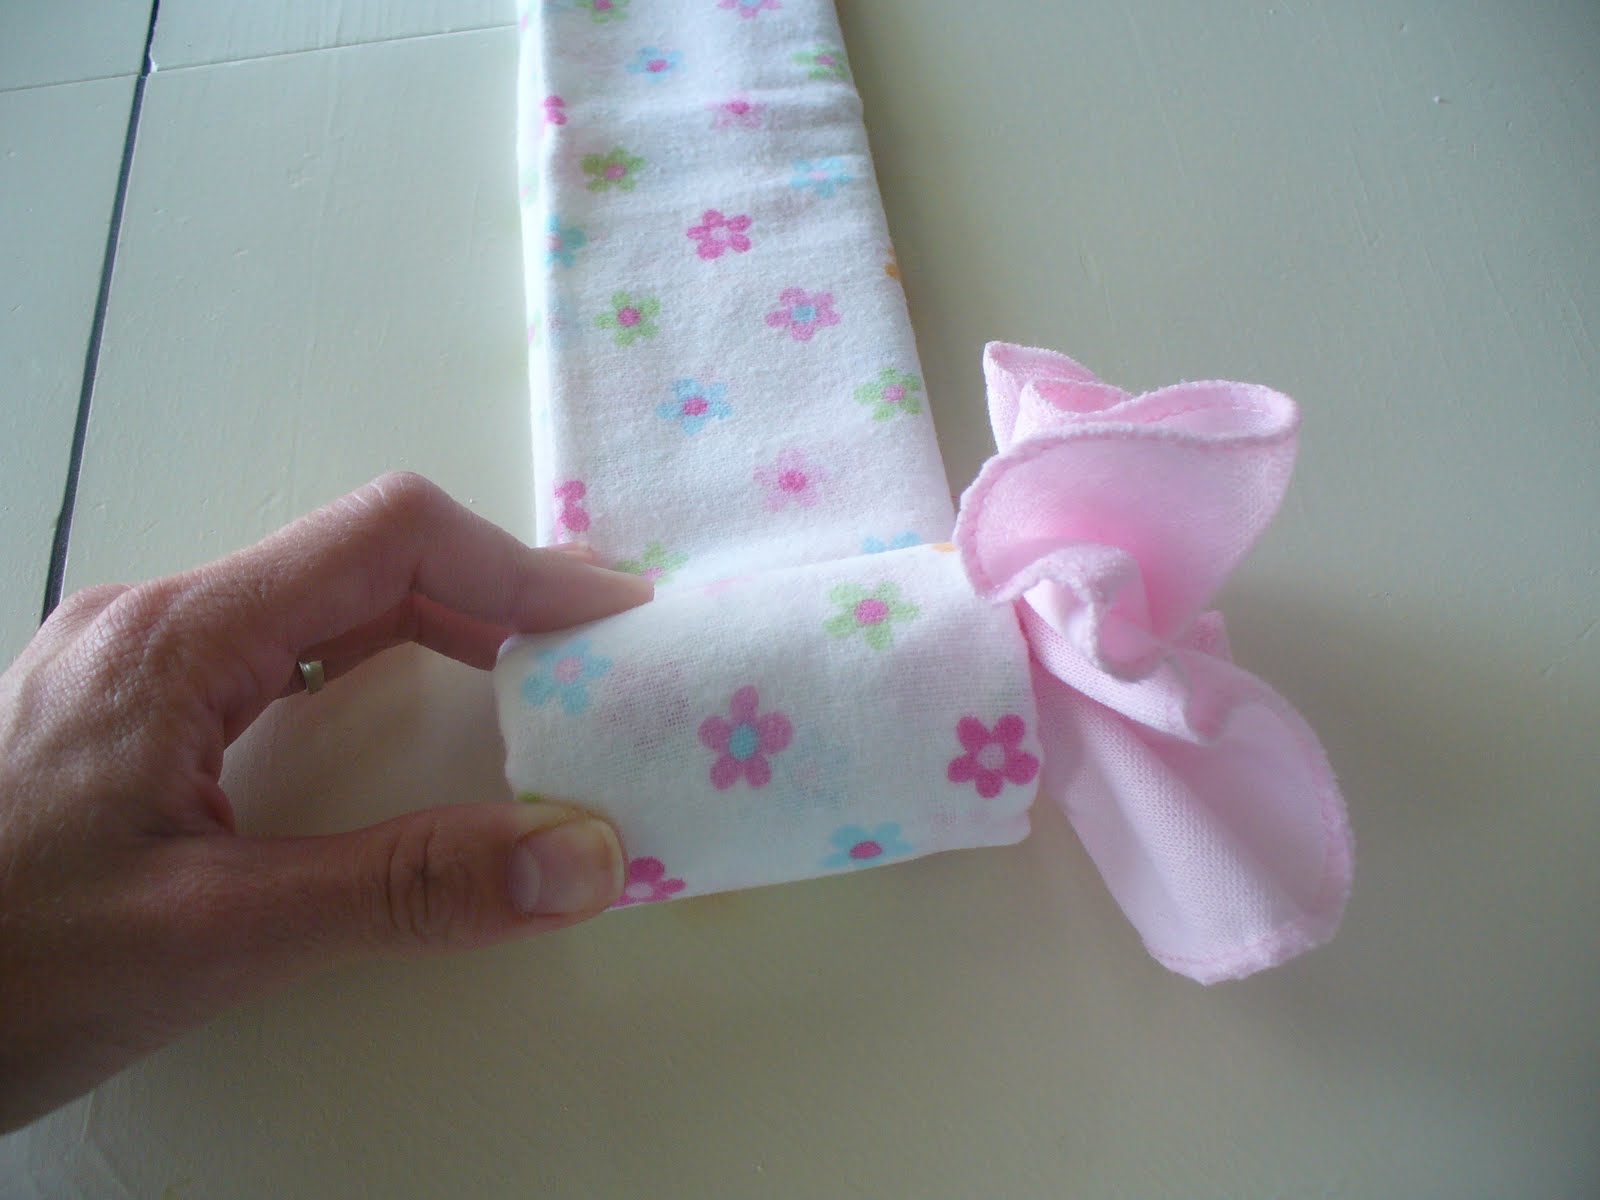
I saw this adorable idea on Little Birdie Secrets and put my own spin on it. Getting the essentials for a baby shower is necessary, but sometimes boring so why not make it fun! You could use just about anything to make them. I've used onesies, burp cloths, wash cloths and receiving blankets. It's so easy and so cute!


Fold receiving blanket (I folded it in half then in thirds)

Lay wash cloth over your hand while making a fist

Push center into hand

Top view of wash cloth

Place at one end of blanket and start to roll

Continue rolling to make cupcake

Place in coffee filter and add ribbon. I usually wrap 4 together in cellophane with a big bow around it.
Isn't that such a cute idea! Wouldn't they be great to use as a baby shower decoration too? Thanks for visiting! Enjoy!

Check out the link parties I link to!

Thursday, June 9, 2011

Diaper Wreath

So I love baby showers! I have had a couple of really good friends have babies in the last couple months and I wanted to share this with you. I've seen some really cute diaper cakes done and I thought about doing one myself, but I wanted something different and wanted some new ideas for decorations and gifts. I came across the idea for a diaper wreath. So here's what you need:

- Wreath form (I got a wicker one from Dollar Tree)
- Diapers in any size (I used size 3)
- clear elastics
- ribbon
- any accessories (I used plastic baby spoons)

  1. Put diaper around wreath form and secure with elastic. Continue all the way around. I alternated the pattern doing one diaper facing forward then the next facing backward and so on.
  2. Add ribbon
  3. Add accessories. I thought of this after the fact and stuck in the spoons because it was what I had on hand. Think how cute it would be with baby toys or shoes and hats. Oh the possibilities!
I think it turned out super cute and not a lot of people have done it! I hope you enjoy!


Related Posts Plugin for WordPress, Blogger...