Google Analytics Tracking Code

Showing posts with label Painting. Show all posts

Saturday, June 23, 2012

Baby's Room Reveal

Our little guy's room is done! Hooray! I absolutely love how it turned out! My husband even loves it and I've found him in there just relaxing in the chair :) Not quite sure what you'd call the theme, but I call it Rustic Beachy Nautical. Yeah I know beachy is not even a real word, but that's the best I could come up with :) Stay tuned for posts about all the DIY projects: compass pillow, striped pillow, vintage canvas map, number canvas, oars upgrade, twine initial, faux basket liner and bedding. Enjoy!


DIY Compass Pillow

DIY Vintage Canvas Map

DIY Number Canvas

DIY Oars and Twine Initial


Wednesday, May 23, 2012

Dresser Turned Buffet Table

Well friends the countdown is on! I have 5 1/2 weeks left till our little guys is scheduled to arrive and that means I've been in full project mode around here. We also celebrated both of our little girls birthdays and mother's day so there's my excuse for the lack of love on this lil blog of mine! Good news is that there are lots of project posts coming!

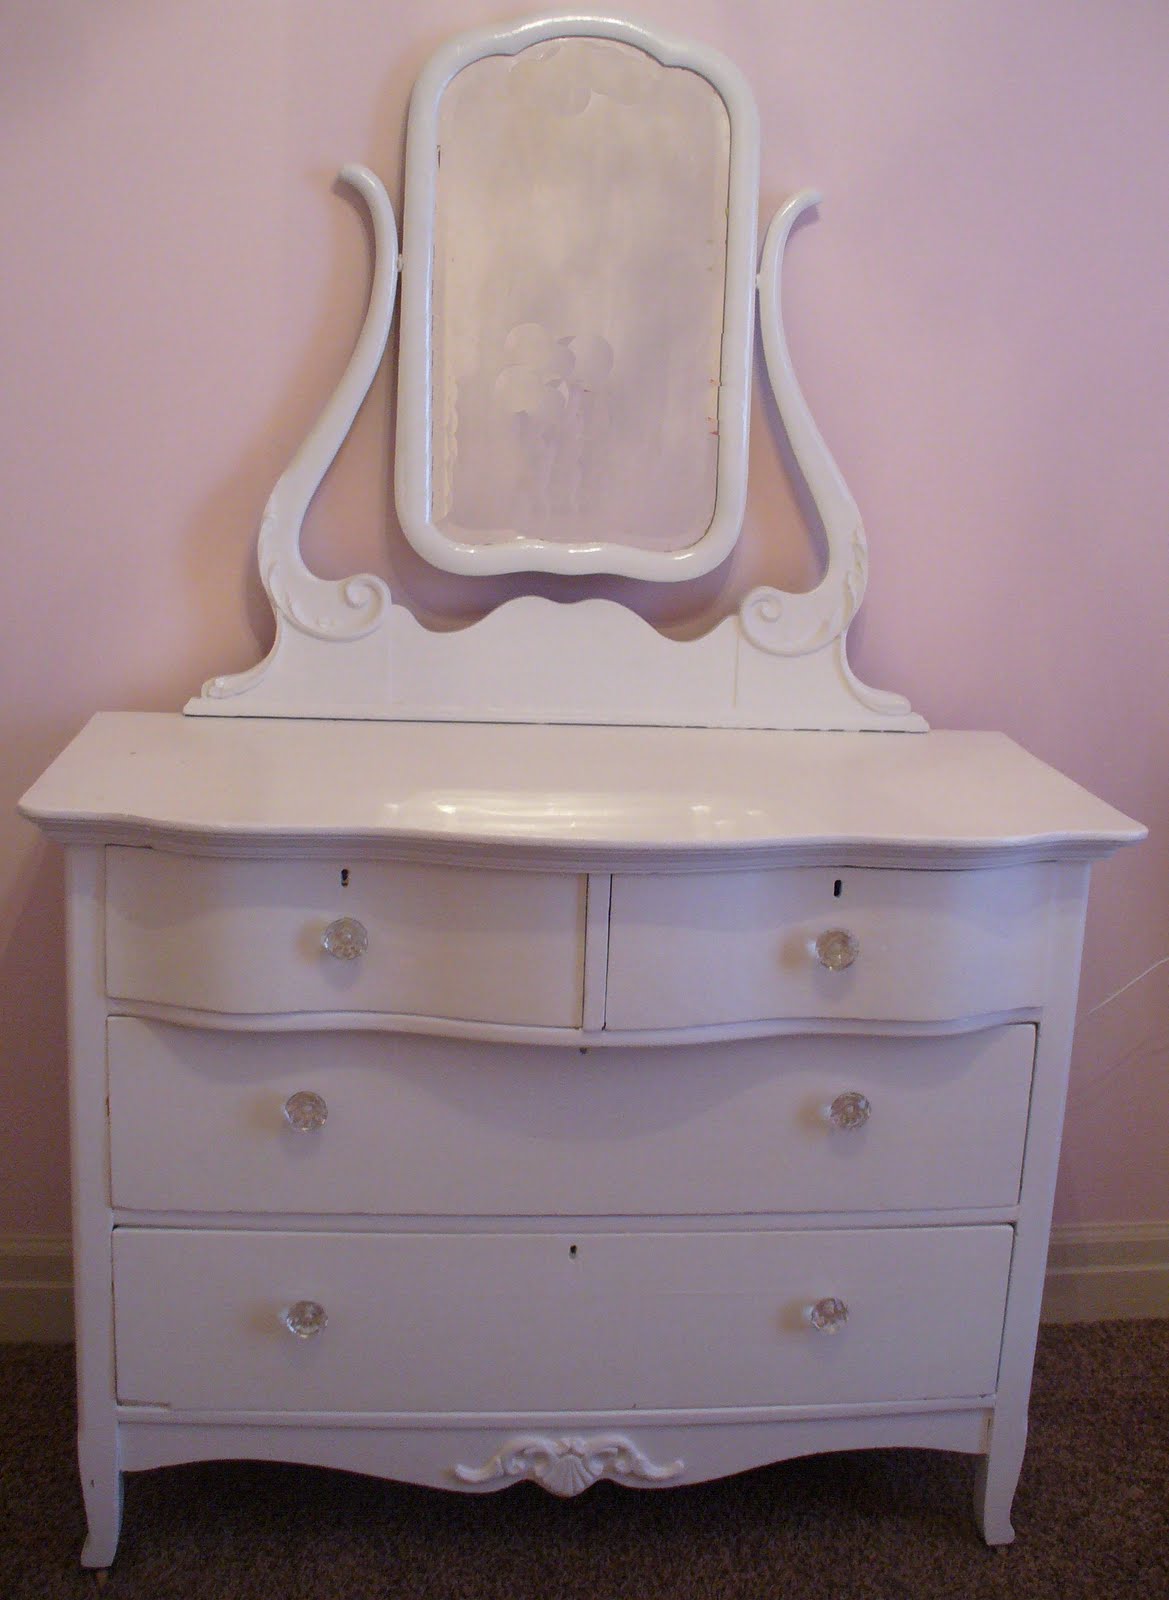
I'm excited to share this first project with you! This is a sentimental piece of furniture passed down from my grandma. Does it look familiar?


Remember this post about this special piece of furniture that I made over for my daughter's room? Here's a reminder of what it looked like after that post.


 Here's what I did to make it the beautiful buffet table that is now in my dining room!

Strip the paint from the top and sand it down to a silky smooth finish.
Apply 2 coats of my favorite spray paint Krylon Ivory to bottom portion of dresser. Then distress on corners and anywhere you feel like it!
Apply Minwax Ebony stain to top and distressed areas. I did 3 coats of stain because I wanted it nice and dark. Apply protective coat. I used polyurethane and applied 3 coats, sanding in between each coat. Add new hardware and it is now a beautiful buffet table!

What do you think? I absolutely love how it turned out and that I had a new use for this special piece of furniture. Another bonus is it added lots of storage to that room! Thanks for stopping by!

Enjoy!
 

Monday, March 12, 2012

Children's Rocking Chair Makeover

Hello there! As promised here's the children's rocking chair for my girls room! If you didn't see my post about the inspiration and colors I'm using you can check it out here.

Now lets refresh our memories of what the chair looked like before.


And after removing over 100 staples, filling the holes in the seat, a little bit of sanding, a solid coat of Kilz spray primer and Krylon Raspberry spray paint here's what she looks like now:


What do you think? I still need to make the pillow for it, but that will be done with the sewing projects. First things first...I will be stenciling this weekend and am so excited about it and can't wait to show you!

Enjoy!

Friday, March 2, 2012

Girl's Room Color Inspiration

Hello all! Hope you've had a fabulous week! Just wanted to share my color inspiration for my girls room.

Better Home's and Garden March 2012 issue pg 48

Better Home's and Garden March 2012 issue pg50

Sherwin Williams
So what do you think? I'm so excited and can't wait for it to come together. I'll keep you all updated as I complete it piece by piece! Have a great weekend!

Saturday, November 12, 2011

Advent Calendar

I love this time of year! We've been listening to Christmas music and getting out Christmas decor. (We don't have Thanksgiving at our home if we did my Christmas decor would not be coming out yet) Contrary to what people may say I'm not forgetting or overlooking Thanksgiving. We love Thanksgiving at our house...lots of yummy food, spending time with family and a day to spend remembering all that we have to be grateful for. Thanksgiving and Christmas go hand in hand for me. There's not a better way to start the Christmas season than to be reminded of what we have in our lives. I love the spirit and excitement that Christmas brings. By the time the week of Thanksgiving rolls around I want to be able to enjoy the holiday season and that includes my Christmas decor. It takes a lot of time to put up all those decorations and I don't want to have to worry about when we're going to have the time to do it so we get started early. The Christmas season is also a time for traditions and today I'm going to share one that I started with my own little family.

This is our advent calendar and countdown to Christmas, but instead of putting treats or prizes inside we do a special activity together as a family each day. I have a jar full of slips of paper with different activities on them to choose from. Each days activity depends on what we have going on that year or in some cases what the weather is like and some days we do multiple activities. (for example on a snow day we build a snowman and
make snow angels). At the end of November I look at the calendar and see what we've got going on for the month of December and put those activities in their box first. This year I knew when we had my side of the family Christmas party (which lasts all day long) so that is our activity for that day. It's supposed to be fun...not stressful! Also some of the activities will change as my children get older. This is something that is for everyone and can be adapted to every family. My oldest daughter gets so excited to open a box each day and see what we'll do together as a family.


Here's what you need to make it:
24 paper mache boxes in an assortment of sizes. The sizes of mine are 2"x2", 2.5"x2.5", 4.5"x3.5", 4.5"x4.5"
magnets for each box. I use the small silver circles that are really strong.
craft paint and brush
variety of numbers (different shapes and sizes) I used stickers, rub-ons and chipboard
different embellishments like jewels, paper cutouts and chipboard
modge podge
magnet board
  1. Arrange boxes in the order you like. Then choose what color each box will be and paint all boxes and lids. Let them completely dry.
  2. Put numbers on each box and embellish.
  3. Apply a coat of modge podge for protection.
  4.  Attach magnets to each box. The larger boxes I used 2.
  5. Fill with your slips of paper.
Here is a list of ideas!
Read the about the birth of Christ in the bible.
Read a Christmas book.
Make a paper snowman.
Go Christmas caroling.
Go see the live nativity.
Wrap Christmas presents.
Make muffins.
Make and decorate gingerbread houses.
Go see Santa.
Learn to play a holiday song on an instrument.
Take a moonlit walk in the snow.
Invite family or friends to have a sleepover.
Cuddle under a blanket.
Learn to say “I Love You” in 5 languages.
Go ice skating.
Write 10 things you’re thankful for.
Write down the 10 best memories from the past year.
Attend a holiday concert.
Go see the nutcracker.
Take a ride in a horse-drawn carriage.
Share your favorite holiday memories.
Write down your favorite traditions.
Write down traditions you want to start with your family.
Bake Christmas cookies.
Go see the lights at temple square.
Ready a book by the fire.
Watch a Christmas movie.
Watch family videos.
Have dinner by candlelight.
Make breakfast food for dinner and eat in your pajamas.
Deliver neighbor and friend Christmas gifts.
Cut out paper snowflakes.
Make popcorn string.
Make cheerio string.
Make candy cane reindeer.
Take a ride to look at holiday lights and decorations.
Watch the snow fall.
Make reindeer puppets.
Build a snowman.
Eat snow.
Go sledding.
Make snow angels.
Write Christmas cards.
Write a letter to Santa.
Make a paper Christmas tree.
Make hot chocolate.

Enjoy!


*Make sure to check out the parties I link up at!

Thursday, October 13, 2011

Black and Silver Pumpkins

Remember last week I showed you my Halloween decor and said I wasn't finished? Well I gave those orange dollar store pumpkins a makeover. Here's what I did:
  • Cut stem off the pumpkins
  • Find a new stem to use (I used sticks found in my front yard)
  • Spray paint pumpkins and stems silver and let them dry completely
  • Polka Dot Pumpkin - using a glue stick lid press it onto the pumpkin just enough to make a circle outline. Paint each circle with craft paint. I didn't have any small brushes so I used a q-tip.
  • Diamond Pumpkin - Draw diamonds on with a marker and then paint with craft paint and foam brush.
  • Striped Pumpkin - Paint every other section of the pumpkins with craft paint and foam brush.
  • Initial Pumpkin - Spray paint thumb tacks black. Once dry stick in pumpkin making your initial.
  • Hot glue new stems in place and add ribbon.
  • Easy easy easy! You're done! Enjoy!


Saturday, October 1, 2011

Shelf Makeover

Just in case you missed my What I Know post over at Southern Lovely here it is! I have this little shelf unit in my entry and I've been wanting to give it a makeover to match and flow with the rest of the pieces in my home. Here's what I did to make it beautiful!


1. Clean with soap and warm water.


 2. Primer is the key to no sanding! Apply an EVEN and generous coat of primer. I use and prefer KILZ primer. There are a couple things to think about when choosing a spray primer or primer by the gallon.
  • If the piece has a lot of detail or rounded edges in it I would use the spray. It will be a little more expensive, but so worth it!
  • If the piece has flat edges I would choose primer by the gallon and invest in a good roller.
Before you move to the next step please please please make sure the entire piece has an even and generous coat of primer.

3. Once the primer is completely dry apply paint. I prefer Krylon, Rustoleum or Valspar spray paint. You will want a good quality spray paint. In my opinion I think spray paint gives the piece a more finished look. It is quick and you don't have to worry about brush or roller marks. One day I hope to own a paint sprayer and then I will use paint by the gallon, but until then spray paint is my best friend!

When spray painting hold the can upright at all times possible and spray in even strokes from one side to the next. For this piece I started on the side at the top left corner; sprayed in one stroke to the right corner and moved back and forth. It will look streaky. Don't spray another coat on until the previous coat is dry. If you do it to soon you will get drip marks and have to sand them out. For each coat I also flip my furniture if possible. For example on this piece I sprayed the first coat with it standing up and the second coat with it on it's side. This will help to eliminate streaks.

Keep applying coats until desired color is reached. For this piece I used Krylon Ivory in a glossy finish and applied 4 coats. I didn't spray the inside and you'll see why below.


4. Next comes the glaze. I use Behr faux finishing glaze tinted black. There are two types of glazing that I'm aware of.
  • Clean glazing - when the glaze is only in the indents, cracks or corners.
  • Dirty glazing - when glaze is applied randomly allover.
Here is a photo of the side while I was glazing. The far right indent has no glaze, middle is how it looks right after I apply the glaze and the far left is what it looks like when the excess is wiped off.


A little glaze goes a long way. Use a foam brush and dip the tip in the glaze and dab into indent making sure to cover it completely with glaze. Using a damp cloth wrapped around your index finger wipe excess glaze off leaving glaze only in the indent. Repeat the steps if needed.

5. For this project I wanted a design on the inside. I've seen many different options such as wall paper and stencils, but I opted for a very inexpensive and less time consuming version and used wrapping paper.
  • Measure and attach the back piece first. Add a 1/2 inch to the width of the measurement and wrap around onto the sides when gluing it in place. This will ensure that you don't have any gaps that will show through at the corners. 
  • Measure and cut the sides. I added 1/4 inch to the width so I could wrap it around on the front inside that will not be seen.
Here's how it turned out.


Much better don't you think? I love it! Enjoy!

Friday, September 30, 2011

{What I Know} at Southern Lovely


Hello friends! So glad you've stopped by! I'm guest posting today over at Southern Lovely on her What I Know spotlight series. I made over this lovely piece of furniture. Go stop by to see the before pictures and a tutorial. Enjoy!


Sunday, September 25, 2011

{2 x 4} Pumpkins

Well we are officially ready for Halloween at our house! I love this time of year and always get so excited pull out my decorations! I spent last week making new pieces to add to my decor and arranging it to the way I want it. I'll share those pictures sometime this week! But tonight I wanted to share a super easy cute project! I made these last year at a craft night with some friends. My super cute neighbor hosted it and came up with this pumpkin project.


Here's what you need:
  • any kind of wood you want to use: 3 blocks for small pumpkin, 4 blocks for large (small pumpkin is 5 in tall, large is 7 in) The blocks do not need to be smooth. As you can see from the photo mine were very imperfect, but that's what I like so much about them!
  • orange paint
  • stain
  • dowels for stem
  • ribbon and wire
  1. Paint wood blocks orange. You don't need to worry about painting the bottom or the sides that you won't be able to see. Make sure they are completely dry before adding stain.
  2. Stain dowels and wood blocks with foam brush or paper towel. For the pumpkin blocks I painted the stain on and wiped off with a paper towel leaving most of it in the cracks and dents.
  3. We used a nail gun to attach the blocks together. You could also use liquid nails. Just FYI hot glue will not work :)
  4. Hot glue on stem.
  5. Add ribbon.
  6. Twist wire around a pen or pencil and hot glue end in the ribbon.
And you're done! Super easy and very inexpensive! Enjoy!

Friday, June 17, 2011

Nursery...Painting

So my baby is not such a baby anymore...she just turned one. And yes I'm still working on decorating her room. Why you ask? Because I had a huge flop when it came to painting her room. When choosing a color for her room before she was born I really wanted to do something really girly. My hubby on the other hand wanted to do a neutral color that would go for a boy or girl (can you tell that he really wants a boy next). He talked me into a fun bright green only it looked horrible with our nursery furniture. I got the entire room painted green, moved the furniture in and I hated it. I wanted so bad to like it and fully decorated it two different times in hopes that I would like it. It didn't work. So after a year of living with the horrible green that I absolutely hated I got the energy to paint it again. I decided to do a tan on the bottom half and purple on the top with a rail all the way around the room. This way if we do have a boy next I'll only have to paint the top. I absolutely love how it turned out and no longer cringe when I go into the room. Don't mind the empty walls...it's still a work in progress and I haven't quite decide what I'm going to do with the rest of it. Enjoy!

*Check back for my painting techniques and tidbits. Within the next week I'll be starting my master bedroom and will take pictures as I go so it's easier to explain.


Related Posts Plugin for WordPress, Blogger...