Google Analytics Tracking Code

Monday, August 1, 2011

Deni's Room

So I've been working on my daughter's room for awhile now adding bits and pieces as I can or get inspiration. When I started it I new I wanted something that was bright and fun. It's still a work in progress and there are things that I want to change like her bed frame, but it was free and it works :) But I wanted to share the flowers that I made for her walls. I cut all the shapes out of vinyl by hand and with my Cricut (most shapes came from accent essentials cartridge). Some of the shapes were meant to be flowers and some I combined and and layered to make flowers. The circle leaf stem is actually a border design and the rest of the stems and leaves I cut by hand. I first mapped it out by drawing a sketch of how I wanted it to look and choosing which colors I wanted to use where. Then I cut them and used transfer paper to put them on the wall. It was super easy especially with my mom's help to keep my girls entertained while I worked on it. Also my mom had all the vinyl on hand and was so nice to give it to me for FREE! She's fabulous I know! It's such a fun room to be in and both girls love playing in there! Enjoy!


The leaves in this picture are little strips of vinyl. I light drew the leave shape on the wall and then cut each strip and stuck it on there.

This flower is one that I used different shapes to create the shape of a flower. I had to stick each little piece of vinyl on by hand...time consuming, but worth it!

This one I also did all of it by hand. I started with the flower shape and added the polka dots and trim around the edge.


Thursday, July 28, 2011

Birthday Decorations: Minnie Mouse Tissue Puff

I made these for my daughter's birthday party this year. They turned out so cute and they were so easy to make. I didn't take pictures of the step by step when making the Minnie puffs, but I have pictures of a different one. Enjoy!

Supplies:
tissue paper - I used 4 packs each pack had 10 sheets
fishing line or whatever you want to tie it
stapler
tulle or ribbon for bow


  • Use one pack of tissue. Lay all 10 sheets flat and cut to desired size. For the head I used the size that it was.
  • Fold accordion style like a fan. 1 inch folds.

  • Tie fishing line around the center of your fan tightly. Leave a long end if you want to hang. Another cute idea that I did with these was for our Young Women New Beginnings. We tied them with tulle and left enough to hang them from the ceiling.

  • Start puffing out fan by separating each sheet of tissue.


  • For 2 ears I used 1 pack of 10 sheets of tissue cut in half and follow the same instructions. I used a stapler to attach them to the head.
  • Attach bow and that's it!

Wednesday, July 27, 2011

Minnie Mouse Costume

Hi friends! Thanks for stopping by! If you haven't yet please follow me and leave a comment and let me know you were here. I appreciate all the support!

Now on to the good stuff! So are you excited for Halloween?! I know you probably haven't even been thinking about it but I've been wanting to share this project since I started this lil spot! It's almost August and that means just a couple months till Halloween! Hey if my summer is coming to an end (much to soon!) I need to have something to look forward to! Anyway, my cute little Deni loves loves loves Minnie Mouse! So last year when I asked her what she wanted to be for Halloween it was no surprise when her answer was Minnie Mouse. Now I'm not into character clothing. My girls can wear all the character and princess pj's they want, but we don't own one princess or Dora t-shirt. It's just not my style. So when it came time to look for a Minnie Mouse costume I just wasn't impressed. $40 for a cheesy not very well made and only includes the little dress costume....so not for me! So I set out on making my own. It turned out so stinking cute! Of course that is 100% my opinion. :) I did it very similar to the girls dresses I made a few weeks ago and you can see that tutorial here. We used this adorable costume for Halloween last year and her birthday party a couple months ago.

Here's what I used:
4 yards red tulle
white pom poms
white boa
polka dot ribbon
elastic
craft glue
white gloves
black beanie (you never know what kind of weather we'll have in Utah on Halloween)

Here are the differences from the tutorial on the Summer Dress.
  1. The measurements ended up being perfect to leave the tulle folded in half for the length by 4 yards for the width.
  2. Attach white pom poms with craft glue. Make sure the glue only goes through the first layer of tulle.
  3. Hand sew feather boa on seam where you've inserted the elastic. I also glued the edges of the boa to keep it from unravelling and leaving feathers all over my house.
  4. Hand sew feather boa to top of white gloves.
  5. Bows for shoes. Tie tulle in a bow and hot glue ribbon bow on top of it. I used twisty ties (you know the things on bread...that's what we call them) to attached them to her black shoes.
The Minnie Ears my daughter is wearing came from Disneyland (we went just a couple weeks before Halloween)

Halloween 2010

We added the beanie in this picture...it was so cold! You can also see the shoes really good in this one.

Deni also wanted a Minnie Mouse birthday party this year so this costume got double duty! We had a big mousketear adventure and I made each child their own Mickey/Minnie ears. It was super easy! Get headbands from the dollar store (mine came in a 4 pack) cut ear shapes from thick black foam. I purchased one piece for $1 and it made 8 headband ears. Hot glue ears to headband. For the Minnie ears I hot glued a bow on. They were a huge hit at the party and the left over ears are favorites in the dress up box. I'll be sharing a few more projects from the Minnie birthday party later this week or next. Have a fabulous day! Enjoy!

Our little family all sporting Minnie and Mickey ears at Deni's 3rd birthday.


Tuesday, July 26, 2011

Children's Table Makeover

My daughter loves playing kitchen, having tea parties and doing all sorts of art projects. I think every kid needs to have their own table that's just their size. I wanted something that would be cute, stylish, durable and not just a folding table. Cute children's tables can be pretty pricey and you know that's not my style. I found this one at Ikea for $20 and put my own spin on it. Enjoy! Also please click to follow me and leave a comment so I know you were here! I really appreciate all the support!

Here's what I used:
table and chairs
modge podge
paper
alphabet/number stickers
paint (if you want to change the color)


  1. Paint table
  2. Measure each place you want to cover with paper. I used coordinating paper, but used a different piece on every section. I covered all sides of the chairs including the seat. For the table I used the stickers to cover all sides.
  3. Apply modge podge one section at a time and adhere paper. I also put a layer of modge podge over the paper and stickers to give it extra protection and to make it easy to wipe off.

THANK YOU!

I just need to say thanks to everyone that has left such nice comments, emailed me, featured my projects and clicked to follow my blog. This blog has been so fun! It's helped me to hear from you and to see new followers. If you haven't become a follower yet please do and leave me a comment so I know you've been here! Thanks again you really have no idea how much I appreciate your support in starting this lil blog!

Saturday, July 23, 2011

In Full Bloom

This is my mother's day gift at it's best! My husband does all the work of planting our flower beds and pots and I get so excited for them every year! Flower beds for me are like an accessory for your yard. It brings beautiful colors in and makes it a wonderful place to be. We spend lots of time out here. I love that I get to enjoy my mother's day gift all summer long! Enjoy!


Wednesday, July 20, 2011

Deni's Dresser Makeover

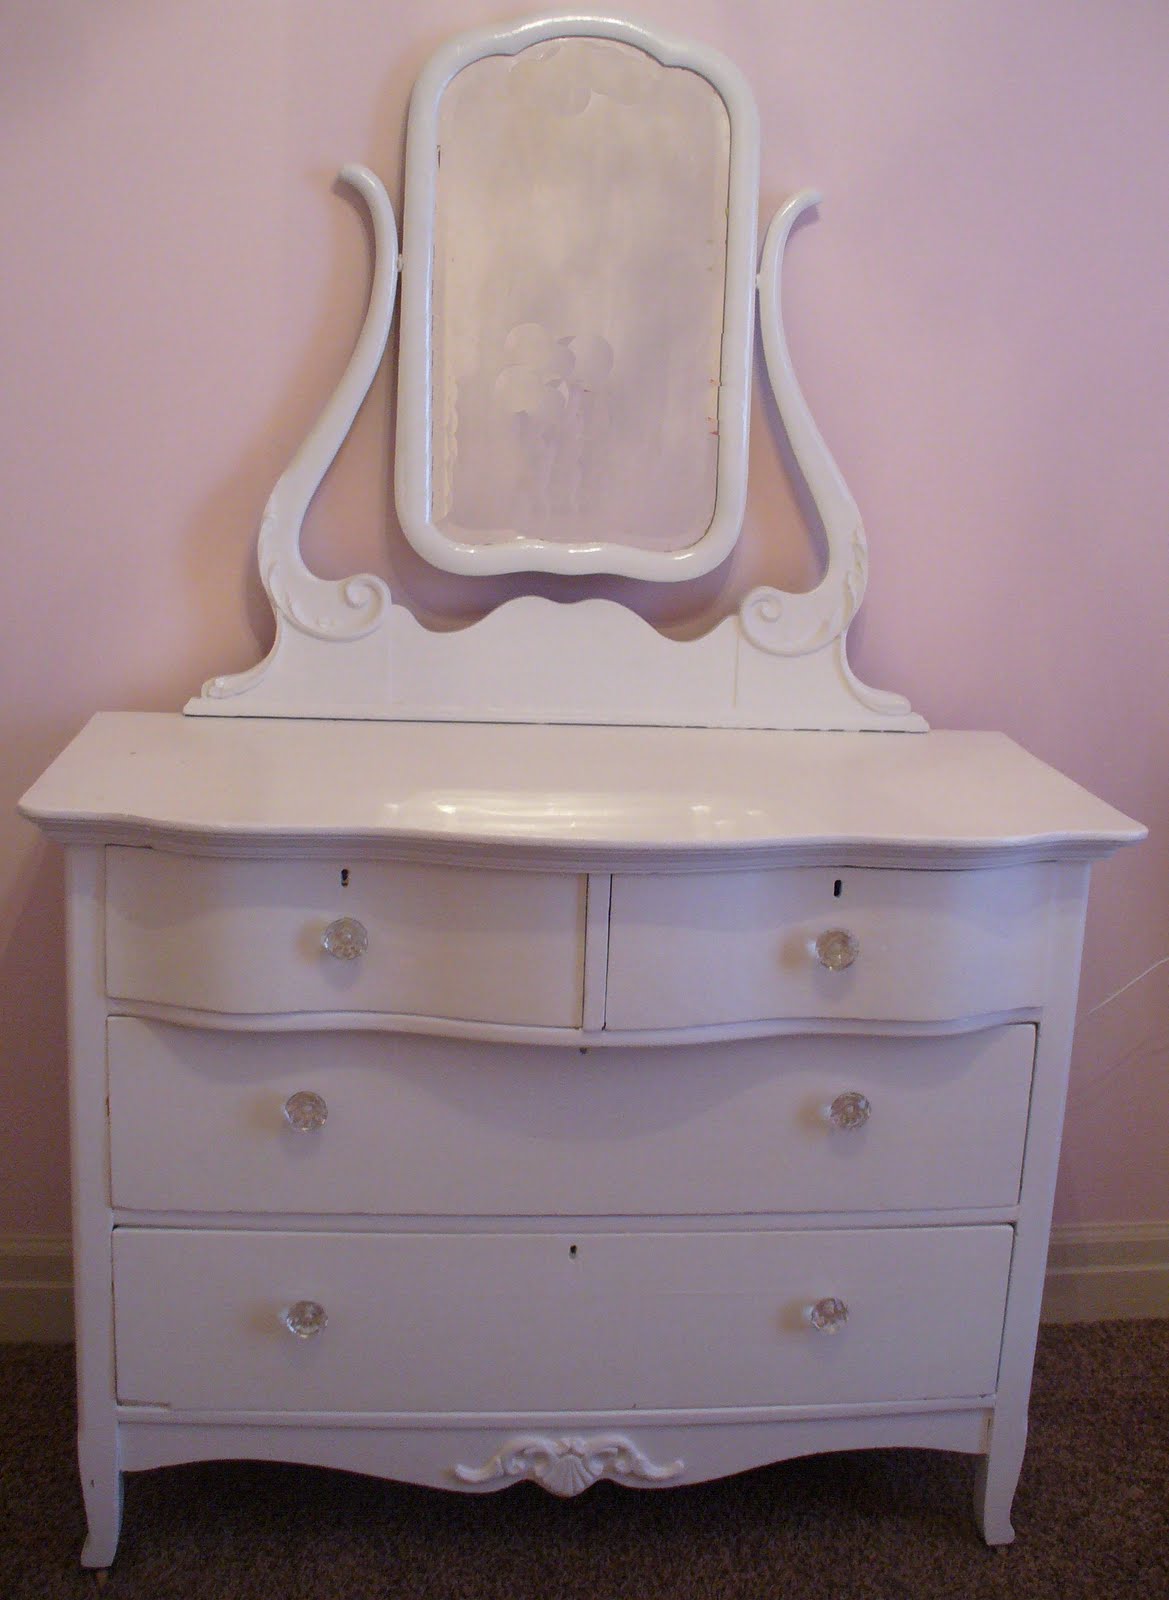
This dresser has been in the works for over a year! Why you ask? Because stripping 2 coats of 60 year old paint out of detail work takes so much time! And I'm a perfectionist so that probably added to it. I do have to say that on a flat surface the paint came off like a charm! I used spray paint stripper and it was so easy to use. This dresser has been in my family for a long time. It was used by all my aunts and mom growing up and then used by me all growing up. When my mom was young they had put a coat of white on it and then a coat of pink. The paint was old and cracking and not in good shape. I love how it looks now and I'm so glad that I have it for my daughter to use. Enjoy! Also if you haven't clicked to follow me please do! I also love comments so let me know that you were here!

I used Kilz spray primer and Krylon Glossy White. The dresser had long handles on it before so I filled the holes with wood filler and sanded it down before I painted it and then added the knobs.

The dresser finished and beautiful!

This is the mirror after I had stripped the paint off
Linking here.
Related Posts Plugin for WordPress, Blogger...